Sverige 2015

Thursday, September 22, 2011

Friday, April 29, 2011
Royal Wedding Extravaganza
Top of the morning to ya!
I'm back! For now, at least. Life is so busy that I barely have time to breathe -- but I'm loving every minute of it! I'm so blessed and grateful to have a loving (and ridiculously hilarious) husband, a wonderful family, amazing friends, two jobs that I adore, and really great co-workers.
I do miss blogging, though. And what better day to get back to it than on a royal holiday? I love royal weddings. This day was almost as exciting for me as when our beautiful Swedish Crown Princess Victoria wed her beloved Daniel last year. Congratulations to Prince William and Catherine!
In celebration of this joyous occasion, Luke (my hubby) and I decided to throw a Royal Wedding Extravaganza! We decided that a day off would do us both some good (Luke worked two "normal" 13 hour days + two 17 hour days and I've been swamped at work this week -- so we thought we deserved it!)
I asked one of the loveliest Brits I know what an appropriate British morning treat would be -- she suggested quiche and scones, so that's what we made!
Luke loves spicy food, so we decided to make Chorizo Quiche. Here is the recipe:
Chorizo Quiche
Adapted from The Food Network.
Ingredients:
Butter, for greasing the dish
Crust:
1 1/2 c all-purpose flour
1/4 tsp salt
8 Tbsp chilled unsalted butter, diced
5 Tbsp chilled water, plus extra as needed
Filling:
6 oz chorizo, or spicy Italian sausage, casings removed, and cooked until crisp
4 eggs
1/2 c Mexican crema, or creme fraiche
1 c grated Manchego, Swiss, or Pecorino Romano cheese
1/2 c diced russet potatoes, boiled until tender and cooled
1/4 c whole milk
Salt and freshly ground black pepper
Directions:
Grease 9-inch tart pan or glass pie dish with butter.
Place the flour and salt in a food processor and pulse to combine. Add the chilled butter and process to a coarse meal. With the machine running, add 5 Tbsp of water in a steady stream until the mixture forms a dough. Add additional water, 1 Tbsp at a time, if the dough is too dry.
Shape the dough into a ball and press into the bottom and sides of the prepared tart pan or pie dish. Refrigerate for 15 minutes. Preheat the oven to 425 degrees F. Line the crust with foil and fill with pie weights (or dried beans). Bake for 15 minutes. Cool completely (can be made 1 day ahead).
Mix the chorizo and remaining ingredients. Pour into the prepared crust. Bake until the quiche is puffed and cooked through, or when a knife inserted into the center of the quiches comes out clean, about 45 minutes. Cool slightly. Serve warm or at room temperature.

To top this delicious morning treat off with something sweet, we also made:
Blueberry Scones with Lemon Glaze
Adapted from The Food Network.
Ingredients:
Blueberry Scones:
2 cups all-purpose flour
1 Tbsp baking powder
1/2 tsp salt
2 Tbsp sugar
5 Tbsp unsalted butter, cold, cut in chunks
1 cup heavy cream, plus more for brushing the scones
1 cup fresh blueberries
Lemon Glaze:
1/2 cup freshly squeezed lemon juice
2 cups confectioners' sugar, sifted
1 lemon, zest finely grated
1 Tbsp unsalted butter
Directions:
Preheat the oven to 400 degrees F.
Sift together the dry ingredients; the flour, baking powder, salt, and sugar. Using 2 forks or a pastry blender, cut the batter to coat the pieces with the flour. The mixture should look like coarse crumbs. Make a well in the center and pour in the heavy cream. Fold everything together just to incorporate; do not overwork the dough. Fold the blueberries into the batter. Take care not to mash or bruise the blueberries because their strong color will bleed into the dough.
Press the dough out on a lightly floured surface into a rectangle about 12 by 3 by 1 1/4 inches. Cut the rectangle in 1/2 then cut the pieces in 1/2 again, giving you 4 (3-inch) squares. Cut the squares in 1/2 on a diagonal to give you the classic triangle shape. Place the scones on an ungreased cookie sheet and brush the tops with a little heavy cream. Bake for 15-20 minutes until beautiful and brown. Let the scones cool a bit before you apply the glaze.
Technically you should make this simple lemon glaze in a double boiler (i.e. over a pot of simmering water with a heatproof bowl set on top), but it's even simpler to zap it in the microwave. Mix the lemon juice and confectioners' sugar together in a microwave-safe bowl. Stir until the sugar dissolves. Add the lemon zest and butter. Nuke it for 30 seconds on high. Whisk the glaze to smooth out any lumps, then drizzle the glaze over top of the scones. Let it set a minute before serving.

Add a spot of tea and you're ready to go. Cheers!
Monday, January 17, 2011
New York-Style Crumb Cake
Hello dears,
Last week, some of my in-laws came to our home for a Bible study and time of prayer. A firm believer in bonding through the breaking of bread, I wanted to serve a bite to eat. I decided to try my hand at Bon Apetit's New York-Style Crumb Cake. I am not going to lie, it was kind of fun baking something without using dietary substitutions or worrying about fat content. This cake is definitely not a health food item.
Although the recipe calls for 1 hour in the oven, I had to keep my cake in longer. Be sure to test it before pulling it out of the oven, to ensure that it is no longer doughy. The finished product was (according to me) not my finest culinary accomplishment, but it was a hit with my fantastic brothers and sisters-in-law, so I must have done something right. Thank you, Bon Apetit, for providing me with yet another fun dessert idea.
New York-Style Crumb Cake
From Bon Apetit Magazine
Topping:
1 cup packed dark brown sugar
1/2 cup sugar
1 1/2 Tbsp ground cinnamon
1/2 tsp salt
1 cup (2 sticks) unsalted butter, melted, warm
2 1/2 cups all purpose flour
Cake:
2 1/2 cups all purpose flour
1 tsp baking soda
3/4 tsp baking powder
1/2 tsp salt
3/4 cup (1 1/2 sticks) unsalted butter, room temperature
1 1/2 cups sugar
2 large eggs
1 1/3 cups sour cream
1 tsp vanilla extract
Topping:
Mix both sugars, cinnamon, and salt in a medium bowl and whisk to blend. Add warm, melted butter and stir to blend. Add flour and toss with fork until moist clumps form (topping mixture will look slightly wet). Set aside.
Cake:
Position rack in center of oven and preheat to 350 degrees F. Butter 13x9x2-inch glass baking dish. Sift flour, baking soda, baking powder, and salt into medium bowl. Using electric mixer, beat room-temperature butter in a large bowl until smooth. Add sugar and beat until light and fluffy. Add eggs 1 at a time, beating until well blended after each addition. Add sour cream and vanilla extract and beat until just blended. Add flour mixture in 3 additions, beating just until incorporated after each addition. Transfer cake batter to prepared baking dish; spread batter evenly with rubber spatula or offset spatula. Squeeze small handfuls of topping together to form small clumps. Drop topping clumps evenly over cake batter, covering completely (topping will be thick).
Bake cake until tester inserted into center comes out clean and topping is deep golden brown and slightly crisp, about 1 hour. Cool cake in dish on rack at least 30 minutes.
Cut cake into squares and serve slightly warm or at room temperature. Do ahead:
Can be made 1 day ahead. Cool completely. Cover and let stand at room temperature.

Serve and savor. Happy baking!
Monday, January 10, 2011
Knotting Some Garlic
Hello my darlings,
Yesterday, to my husbands delight, I craved the smell of freshly baked bread (yes, I crave smells). I decided to try a recipe for garlic knots that I found back in October. This bread was not that difficult to make, and the finished product was well worth the labor. I used to be afraid of working with dry yeast, because in Sweden our yeast is quite different; it usually comes in a wet paste type form. When using dry yeast, I'm never quite sure how warm to make the liquid activating the yeast. However, the more bread recipes I try, the more confident I become in my attempts at reproducing this delicious international staple. And really... who doesn't love the smell of baking bread? I should bottle it and make it into a perfume.
I want to refer you to the website where I found this garlic knot recipe. One of my dear friends shared this website with me, and I want to pass it on to you. It is not only aesthetically magnificent in that the photography makes your mouth water, but the recipes are tried and true...truly delicious.
The website: http://annies-eats.net/
The recipe: http://annies-eats.net/2010/09/29/soft-garlic-knots/
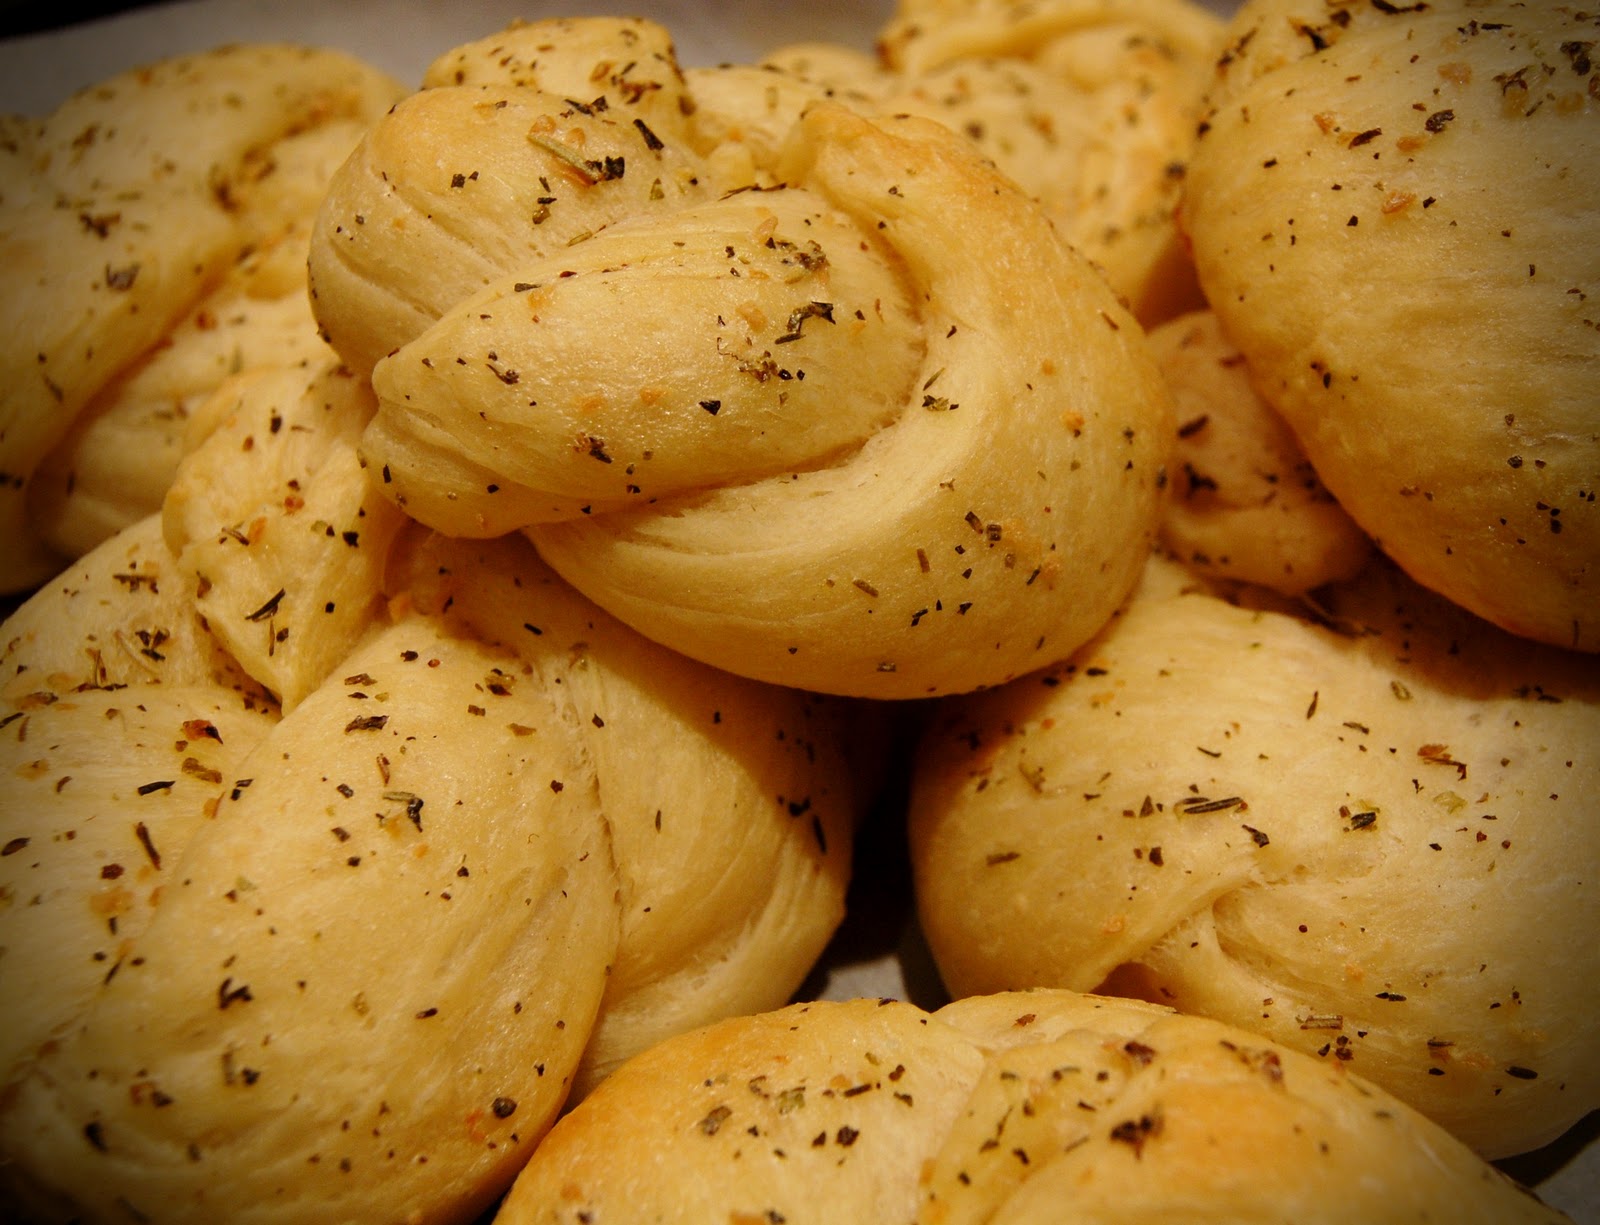
(Above: my garlic knots, fresh out of the oven)
Sunday, October 24, 2010
I've Missed You.
Dear readers,
I'm alive, I promise! Thank you for your patience. Work has been keeping me quite busy lately, so please pardon my blogging hiatus.
I have some delicious, healthy recipes to share with you today. These are adapted from Jillian Michaels' Master Your Metabolism Cookbook.
Here is a wonderful, end-of-summer recipe that requires some work on the chef's part, but is totally worth it in the end:
Roasted or Grilled Vegetables with Romesco Sauce
Adapted from Jillian Michaels' Master Your Metabolism CookbookOlive oil spray, if grilling
 6 plum tomatoes (about 1 pound), cored and halved
3 medium zucchini, sliced in half lengthwise
4 bell peppers, 1 red and the rest red, yellow, or orange, cored, seeded, and each cut into 6 wedges
2 small eggplants (about 6 ounces each), each cut lengthwise into 3 slices
1 pound asparagus, ends trimmed
1 pound large cremini or button mushrooms, stemmed
1 large red onion, cut crosswise into 1/4-inch slices
5 Tablespoons extra-virgin olive oil
3/4 teaspoons salt
1 1/4 teaspoons ground black pepper
1/2 cup slivered almonds, toasted
6 garlic cloves, peeled
2 Tablespoons sherry vinegar
If roasting the vegetables, preheat the oven to 450 degrees F and have ready three or four large, rimmed baking sheets or shallow roasting pans and one pan or small cast-iron skillet for the mushrooms. If grilling, spray a grill grate with olive oil and prepare a medium-hot grill.
Place half of the vegetables in a large bowl and add 1 1/2 Tbsp of the olive oil, 1/4 tsp of the salt, and 1/2 tsp of the pepper. Use your hands to gently toss the vegetables so that they are evenly coated with oil. Repeat with the remaining vegetables and another 1 1/2 Tbsp olive oil, 1/4 tsp salt, and 1/2 tsp pepper.
If roasting, arrange the vegetables on the baking sheets, placing the mushrooms in their own small pan. Do not overcrowd the vegetables, or they will steam instead of roasting. Roast until lightly browned and tender when pierced with the tip of a sharp knife, 20 to 40 minutes. Some vegetables may be done before others, so start checking after 20 minutes of roasting, and remove any vegetables that are ready. Return the remaining vegetables to the oven until they are fully roasted.
Or grill the vegetables 5 to 6 minutes per side.
When the vegetables are cooked, set aside 4 tomato halves and 6 red bell pepper wedges. Arrange the remaining vegetables on a large platter; set aside while you prepare the sauce.
In the work bowl of a food processor, place the almonds and garlic. Process until the nuts are ground. Add the reserved tomatoes and bell peppers along with the remaining 2 Tbsp olive oil, the remaining 1/4 tsp each salt and pepper, and the vinegar. Process until the mixture is well combined; it will not be completely smooth. Transfer to a small bowl and serve with the vegetables.
Delicious! I served this dish with dinner rolls fresh out of the oven. They are definitely not the healthiest rolls in the world, but very easy to make:
Dinner Rolls
1 cup warm water
2 pkgs. active dry yeast
1 stick butter (melted)
1/2 cup sugar
3 eggs
1 tsp salt
4 - 4 1/2 cups flour
Optional: additional butter
Combine the warm water and yeast in a large bowl. Let the mixture stand until yeast is foamy, about 5 minutes. Stir in the butter, sugar, eggs, and salt. Beat in flour, 1 cup at a time, until dough is too stiff to mix (some flour may not be needed). Cover and refrigerate 2 hours or up to 4 days. Grease a baking pan or cookie sheet. Turn the chilled dough out onto a lightly floured surface. Divide dough into 24 equal size pieces. Roll each piece into a smooth, round ball. Place balls in even rows in the prepared pan. Cover and let dough balls rise until doubled in volume, about 1 hour. Preheat oven to 325 degrees F. Bake until rolls are golden brown, 15-20 minutes. Brush warm rolls with melted butter, if desired.
I am always looking for new, tasty fish recipes. Here is an exotic, tasty recipe for barramundi or halibut:
Thai Green (or Red) Curry Barramundi (or Halibut)
Adapted from Jillian Michaels' Master Your Metabolism Cookbook

1 Tbsp virgin coconut oil
1 cup thinly sliced red onion
1 cup thinly sliced carrots
1 Tbsp green or red curry paste, or to taste
2/3 cup coconut milk
4 (4-ounce) barramundi or halibut fillets, rinsed and patted dry
1/4 cup chopped cilantro leaves
Lime wedges, for serving
In a large skillet, heat the oil over medium heat. Add the onion and carrots and cook, stirring occasionally, until the onion is softened, about 4 minutes.
Note: I could not find coconut oil, so I simply mixed olive oil with a little bit of coconut milk.
Stir in the green curry paste, and cook for 1 minute. Stir in the coconut milk and bring to a simmer.
Lay the fillets skin side down in the pan, moving the vegetables to the side to make room as you add each fillet. Pile the vegetables on top of the fillets, cover the pan, and simmer for 10 minutes, until the fish is opaque and flakes easily with a fork.
Place a fillet on each of four plates and spoon the vegetables and sauce over the fish. Sprinkle cilantro over each serving and garnish with lime wedges. Serve.
Friday, September 17, 2010
Mediterranean Pizza
Two weeks ago was my birthday. What did the most amazing man in the whole world buy me? Jillian Michaels' Master Your Metabolism Cookbook! Needless to say, I was elated!! Last night I tried one of the recipes from the book and LOVED IT. I think you will too.
Any pizza lovers out there? I looove pizza. However, I also realize the need to eat healthy so I don't swell up like a Goodyear blimp. Well, Jillian Michaels provides a healthy, delicious mediterranean pizza recipe. It is loaded with vegetables and flavor. It is so delectable that you will want to savor every bite.
Thank you, Jillian!
Mediterranean Pizza
Adapted from: Jillian Michaels' Master Your Metabolism Cookbook
 For the crust:
- 1-2 Tbsp organic cornmeal for the baking sheet
- Whole wheat flour, for work surface
- 1 lb whole wheat pizza dough, thawed if frozen
Note: I could not find whole wheat pizza dough at my local grocery store, so I used a pre-baked whole wheat crust. It was still ridiculously tasty.
4 cups (packed) shredded spinach (about 5 oz)
2 tsp extra-virgin olive oil
4 plum tomatoes, thinly sliced
1 Tbsp coarsely chopped fresh marjoram, oregano, or basil leaves
1/2 small red onion
Note: I used a yellow onion because I already had it on hand, but I believe red onions are healthier.
1/3 cup crumbled low-fat feta cheese
1/4 cup pitted kalamata olives, coarsely chopped
1/2 tsp ground black pepper
Preheat the oven to 450 degrees F. (If using pizza dough) spread the cornmeal on a large baking sheet; alternatively, rub the baking sheet with olive oil.
Place the spinach in a microwave-safe bowl with a lid. Cover and microwave on high power until the spinach is bright green and wilted about 1 minute. Transfer to a strainer and rinse with cold water. When cool enough to handle, wrap the leaves in a clean kitchen towel and squeeze out all the excess liquid. Remove the spinach from the towel, using your fingers to loosen and separate the leaves. Set aside.
(If using a pre-baked crust, skip the following paragratph:) on a lightly floured work surface, use a rolling pin and your hands to roll and stretch the dough to a roughly 10x14-inch rectangle. If the dough becomes so elastic that after it is rolled it just snaps back, contracting to its original size, let it rest for a few minutes before continuing to roll. Transfer the dough to the prepared baking sheet.
Brush the dough (or pre-baked crust) with 1 tsp of the olive oil. Arrange the tomatoes on the dough. Sprinkle marjoram/oregano/basil over the tomatoes. Spread the spinach on top, followed by the onion, feta, olives, and pepper. Drizzle the remaining 1 tsp olive oil over the pie.
Bake until the crust is golden 15-20 minutes. If using a pre-baked crust, bake for 10-12 minutes.
Thursday, September 16, 2010
Chicken Tagine
Yesterday I tried a new chicken recipe. I am officially in love with this recipe, because it is incredibly flavorful and still easy to make (except for preparing the chicken...I loathe trying to cut fat from chicken thighs!) The recipe is for Chicken Tagine, which is a North African stew named after the clay pot in which it is traditionally cooked. This dish is sure to be a crowd-pleaser, so the next time you come over for dinner at my house, expect to be served Chicken Tagine!
Chicken Tagine
From: Nutrition Action magazine
3 Tbsp olive oil
 1 1/2 lbs boneless, skinless, chicken thighs
1 tsp turmeric
1/4 tsp groun cumin
1 tsp paprika
1/4 tsp cayenne
1 Tbsp whole wheat flour
2 cloves garlic, minced
2 cups low-sodium chicken broth
2 carrots, chopped
1/2 lb zucchini, chopped
1 medium onion, chopped
1 stick cinnamon
1-15 oz can no-salt-added diced tomatoes
3/4 tsp salt
1 cup whole wheat couscous
In a large, heavy pot, heat the oil over medium-high heat until shimmering. Saute the chicken in two batches until well browned. Remove the chicken from the pot to a plate.
Mix the spices and flour together in a small bowl. Reduce the heat to low and add the spices-flour mixture and garlic to the pot. Stir for 30 seconds then whisk in the broth. Add the vegetables, cinnamon, and tomatoes. Bring to a boil, then reduce to a gentle simmer. Return the chicken to the pot and gently simmer until the vegetables and chicken are tender, about 20 minutes. Season with up to 3/4 tsp of salt.
While the chicken stew is simmering, put the couscous in a heat-proof bowl and stir in 1 cup of boiling water. Cover and let stand until the chicken is ready.
When the stew is done, fluff the couscous with a fork. Serve the stew over the couscous. Serves 6.
Also, please note regarding my recipes utilizing the metric system:
My friend Jess (check out her awesome blog: http://foodloversanon.blogspot.com) just informed me that IKEA now sells basic metric measuring cups with measurements for milliliters and deciliters! If you are interested in trying European recipes (such as my Swedish ones), these measuring cups would definitely be a good investment. Happy cooking!
Subscribe to:
Posts (Atom)